Tabs

 photo 1_zpsaevl5qya.jpg photo 2_zps1mmrug81.jpg photo 2_zps1mmrug81.jpg photo 3_zps6wyhvccd.jpg photo 2_zps1mmrug81.jpg
Showing posts with label Renovation. Show all posts

Friday, April 15, 2016

Balcony Decking

It is always a dream of mine to have an apartment with balcony and when we got ours, we are lucky to get the unit that we wanted. No fancy seaside view, but it's ok for a first (and we get to see sunset!).

Despite the small balcony (I am not complaining), we decided to install timber decking. We chose Chengal wood for its durability despite it being on the pricey side. 


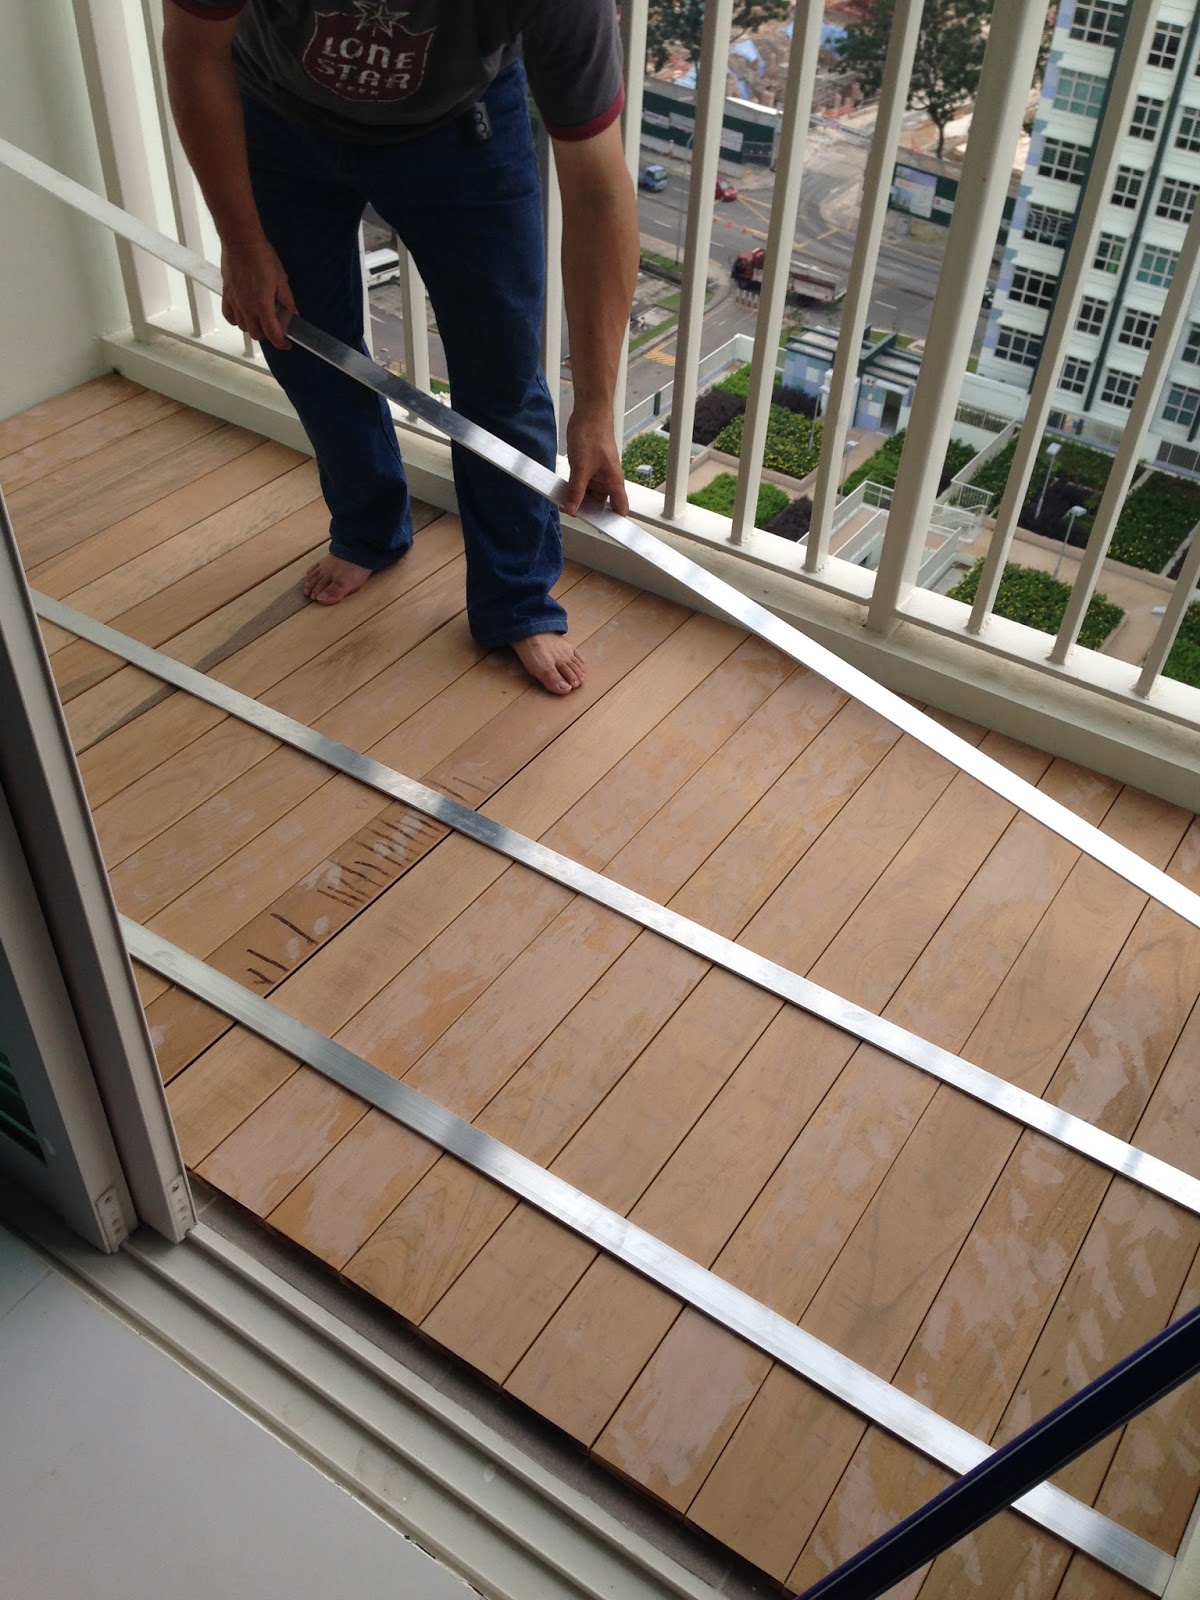
I am blessed to have a very handy dad to help with our renovation process. There he was placing the cut wood to make sure it fits and adding strips of aluminum to slightly raise the decking so water can flow below. For safety reasons, we didn't raise the decking as per normal (higher) and my genius dad came up with the idea of using aluminum strips to raise the decking just slightly. 


The husband drilling holes on the aluminium strips for the nails to attach to the decking, right outside our main door. We have limited working space!


We also sanded the Chengal wood and stained it with dark walnut wood varnish. It is important to varnish your decking for better durability.

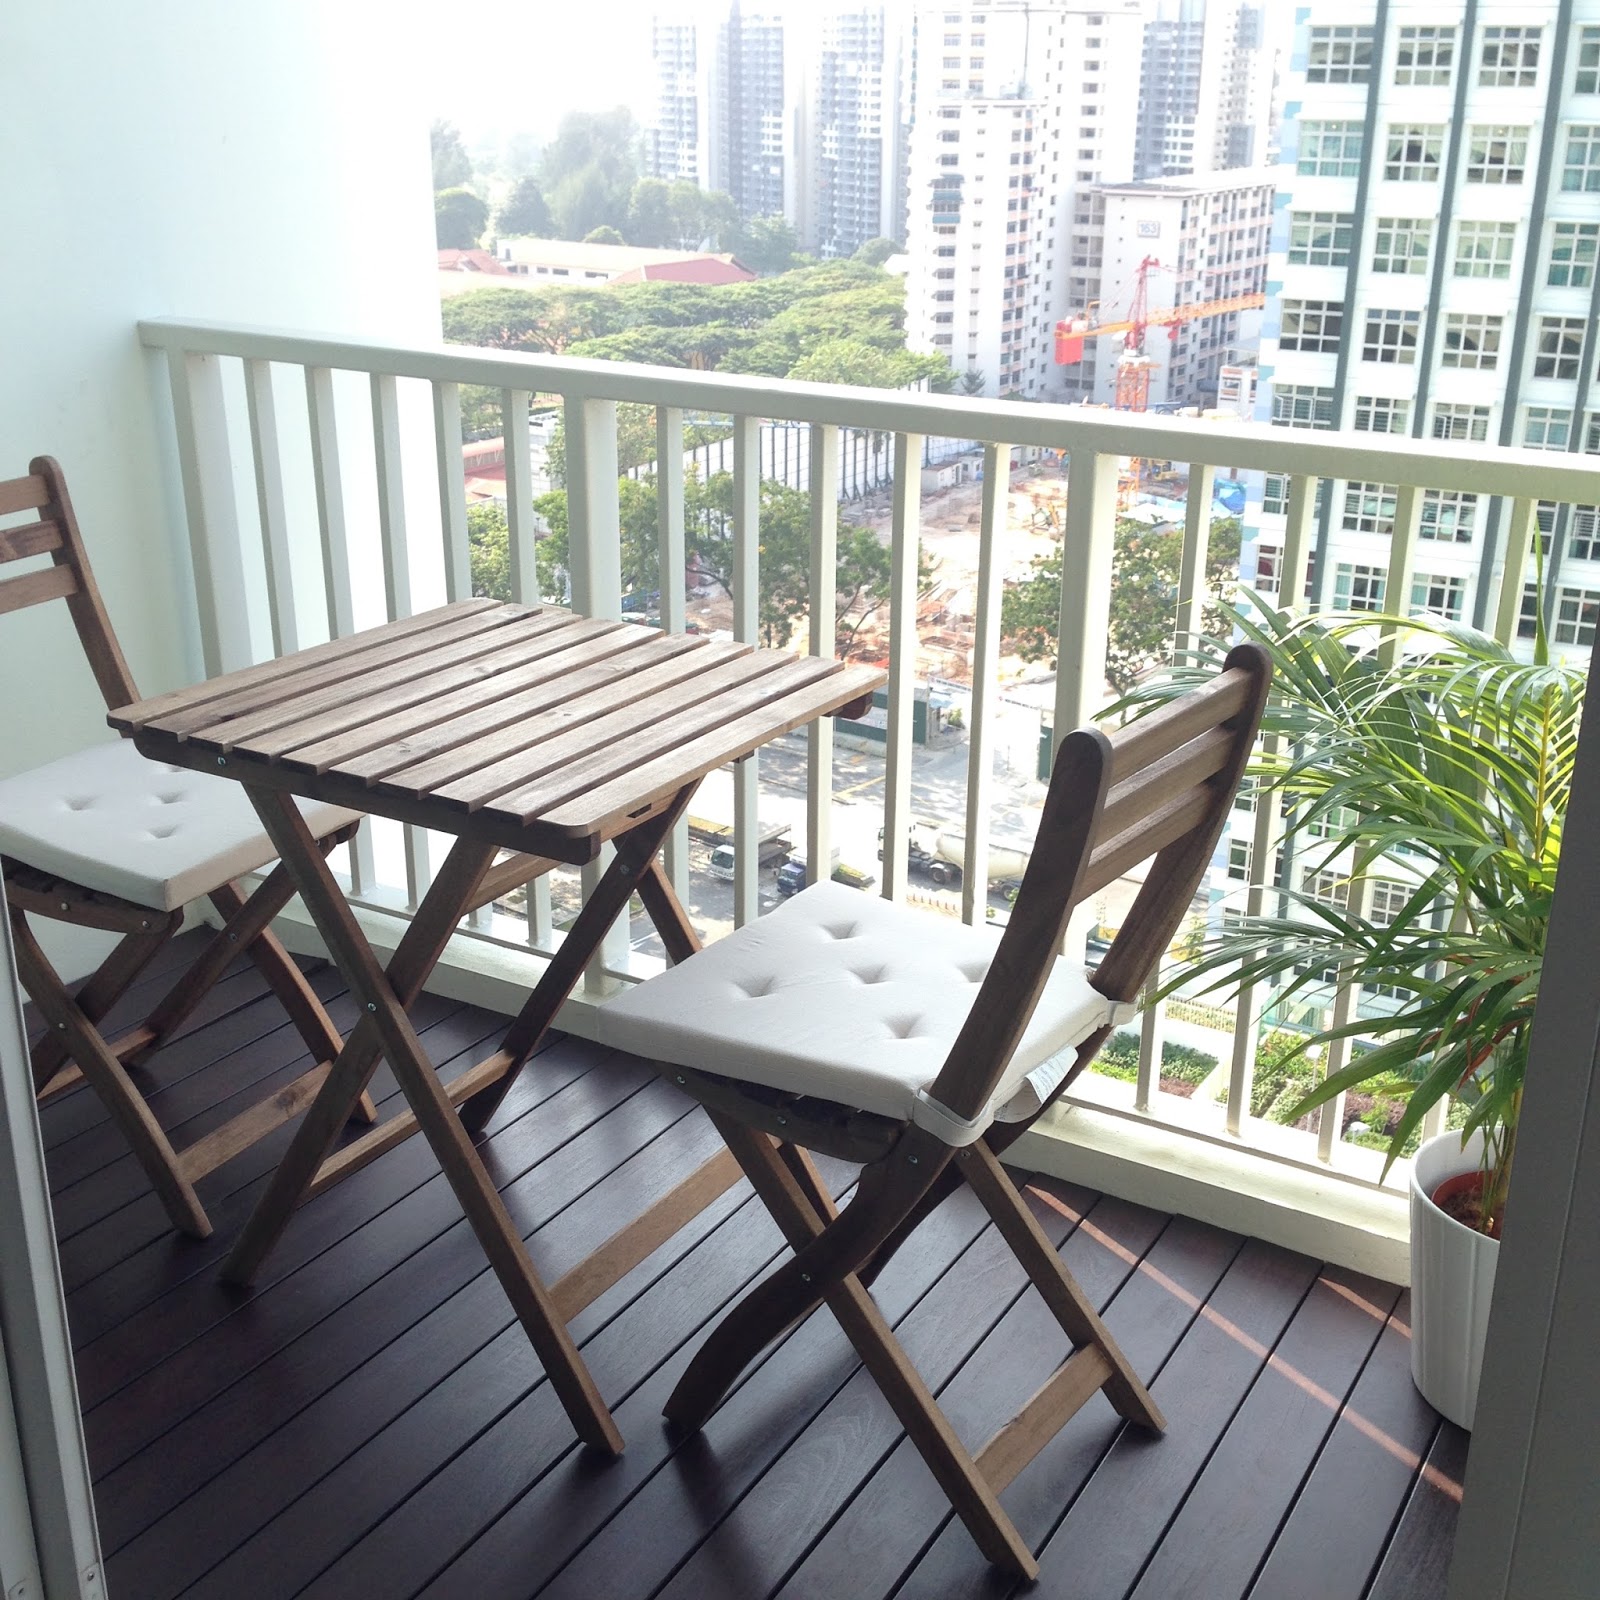
And we went shopping at IKEA for the outdoor furniture. Since we have a small balcony, we have to make sure the furniture we chose fits. There wasn't much choice for us but I quite like the one we got. 

IKEA Askholmen Outdoor Table & Chairs


The finished look!


We also added beige chair pads to the chairs. The plant and pot are both from IKEA.


Now we can enjoy our weekend brunch at our balcony.


The table and chairs are foldable so we keep them after every use to free up the space and to protect the furniture from rain and sun. It is really easy setting them up when needed.

 photo name3a_zps4tnhc2mj.png
Share this post!
Pin This Share on TumblrShare on Google Plus Email This

Friday, April 8, 2016

Laundry Room


We don't really have a legit laundry room but we have the small area behind the kitchen which is called the yard area and its really small. I like to call it our laundry room.

Like all Singapore flats, this room is not exactly pretty. You will see big pipes here and it is really an eyesore. I do not have the before photo of our laundry area but it looks something like this.


Hence, we decided to cover up the hideous pipes by building it to look like a cabinet.


We also added a laundry sink which I totally heart because its so convenient for hand wash clothing. Since the area is really small, adding a sink here is a total challenge. We searched high and low for perfect stainless steel sink that could fit in that space and is deep enough for washing (most small sinks are shallow wash basins). We managed to find this stainless steel sink from Rubine and it cost only about SGD100! 

Rubine Stainless Steel Sink - Model:ZEX 810-53 

Here is the completed look. Not yet decorated but definitely looked better than original. And that sink, so useful! There are also storage space under the sink for extra storage. This "cover-up" not only hides the ugly big pipes but it also serves as storage for brooms and mops. Now I don't have to see brooms and mops all over the floor.


Standing in the kitchen facing the laundry room. After sometime, we felt that the original wall colour is a little plain and boring hence we decided to paint it (should have done so before the carpentry works!).


What's better than getting inspirations from Pinterest? 


In the end, we go with Nippon Paint's "Nice Mint". 


Painting's done! Next will be installing some shelves and add a little decor. 


 photo name3a_zps4tnhc2mj.png
Share this post!
Pin This Share on TumblrShare on Google Plus Email This

Friday, April 1, 2016

Kitchen - Bits & Pieces

Kitchen carpentry works going on. Just some work in progress photos I took. Our kitchen is rectangular shaped hence we can only do two rows of counters. And because the bomb shelter (a.k.a the storage room) is on one side of the wall which means we can't hack down the wall to have an open kitchen, which I am quite sad about. Anyways, like most HDB BTOs flats, our kitchen is not big but not too small either (I have seen smaller kitchens).  


We decided to do one counter "regular" size which fits the hob and sink while the opposite counter a little narrower so we can have a wider walkway. This is one of the best choice we made because it made our kitchen look big yet we have the counter space and storage.


This is the "regular" side with sink, hood, hob & fridge. We did top and bottom cabinets on this side.


This is the narrower side which we only did the bottom cabinets as we felt that having both sides with top cabinets will be "over-crowded" and feels heavy and dark. Not adding the top cabinets makes the entire kitchen brighter and more airy.


Fridge on the the "regular" side. Our wonderful fridge is from LG and I really like it! Big enough for a small kitchen!


I can't seem to find photos of the completed kitchen (or perhaps I forgot to take photos of it!), I will take photos of the kitchen when its is nice and tidy (it is really messy right now!). Anyway, I DIY-ed the dividers in the cutlery drawer by using some scrap cardboard and covered it with nice wrapping paper. I hot glued the individual pieces together and that's it! Now I don't have to search the entire drawer for a spoon or fork! And it makes me happy looking at how organize this drawer is.


On a random note, I do not like dishwasher bottles. I find them ugly looking and spoil the look of a nice looking kitchen. Hence, I bought some clear bottles from Daiso and transferred them in. Added them to a tray and I think it looks so much nicer and neater! I also added chalkboard stickers to the bottles to differentiate the dishwasher and hand soap.


 photo name3a_zps4tnhc2mj.png
Share this post!
Pin This Share on TumblrShare on Google Plus Email This

Monday, April 20, 2015

Floor Planner Interior Design

Before executing the renovation, we need to design and plan the layout for our home. Just like most people, we started off by visiting interior design firms and giving them our home layout for them to design for us. Despite seeing a few designers, we did not engage their service. Why? Because I have ideas of what I want and some of them just purely draft out my ideas on the paper. I'm not impressed! Some were really good by designing form scratch without us telling him what we plan to have... which is good because they are not taking my ideas and simply draft them. To be honest, its tiring going from design firms to firms.... and most importantly we have to take into consideration the package price and worthiness.

So in the end we decided to design our own interior, keeping it simple, functional and of course pretty! With that, we need a platform for us to draft our ideas. I did a search online and ended up using this floorplanner website. Its is pretty easy to use plus its free!


There are definitely other software that are better but this has what I needed. Perhaps next time i will venture into other interior design software but for now, we are sticking to this.

It allows you to create your own space with exact measurements and you're able to view it in 2D or 3D form which is nice! It gives you better idea how your house or room will look like after adding certain furnitures or wall colours etc. I specifically think its awesome for gauging the furniture you are planning to buy for a specific area since it will let you see how much space you have or how everything will fit in or not. It helped me decide which sofa I should buy to fit into the tiny space of ours!


You can create the layout for your entire house. This is the plan view of our home and it let us see at a glance what we have as a whole.


Then you can also create layout for specific rooms, and view it in 2D or 3D.


3D view is especially great for you to see the space that you have, and let you know if that dining table is too big or small or whether is there space left for walkway.


This is our office/guest room. You can play around with the items they have. I wouldn't say they have tons of items but there are the basic ones... so play around with it! For example, I needed a daybed but they don't have one. So I used a sofa and simply adjust the size to the size of my daybed and viola! I am still able to see the actual space that the bed will take.


It can't be compare to those that designers use, but it does provide you with an idea how your house or room will look like and how feasible your designs are. I would recommend those (especially newly weds) who are on a budget or those who intend to do your own interior design to give it a try. Pinterest is a great place to source for ideas and you can also follow my board here! Interior design firms usually charge high prices although they provide a one stop service (design and renovate), but you can definitely save by creating your own design, getting contractors and doing DIYs. We try to do as much DIY as possible, it saves cost and I love doing it! It gives me a sense of accomplishment. :)

Have fun in designing your home!

 photo name3a_zps4tnhc2mj.png
Share this post!
Pin This Share on TumblrShare on Google Plus Email This

Friday, April 17, 2015

Renovation starts!

Three months after getting our keys, the renovation works finally started! A quick glimpse of the preparatory works.


Tools all over the house!


Cardboard placed to protect the flooring especially the wooden flooring in the rooms!


That's about it.... I'll talk more based on individual rooms or areas in future posts.
Till then, ciao!
 photo name3a_zps4tnhc2mj.png
Share this post!
Pin This Share on TumblrShare on Google Plus Email This